如何使用 $\LaTeX$
簡介
$\LaTeX$ 是款數學專業編輯軟體,相對起 Word 擁有更高的自訂性、擴展性與功能性。而$\LaTeX$的數學語法稱為 TeX 語法,基本上常用的數學編輯語言都是用此語法,能用指令把所有想像的到各種符號都打出來,例如 $E=mc^2$ 或是
$$ \begin{align*} f (x; \mu, \sigma^2) & = \frac{1}{\sqrt{2 \pi} \sigma} \exp \left[ - \frac{1}{2} \left( \frac{x - \mu}{\sigma} \right)^2 \right] \end{align*} $$工具
推薦一些工具能快速上手$\LaTeX$
- Overleaf:免安裝線上$\LaTeX$編輯器,也有各式現成模板可以直接使用。
- Overleaf 教學網站:$\LaTeX$語法使用教學。
- Codecogs:數學方程式編輯器,提供可視化的介面,是不記得數學指令的新手福音。
- Table Generator:在$\LaTeX$裡面打表格是一個相對麻煩的事情,有這個工具能快速幫你實現。
- List of LaTeX mathematical symbols:符號表。
第一份數學檔案
認識Overleaf
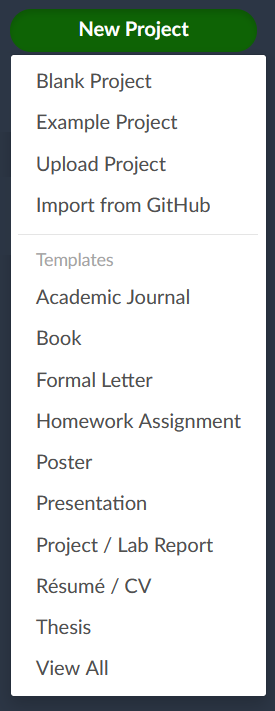
先到Overleaf 註冊一個帳號後,開啟一個新的專案,他會提供一些範例模板可供使用,這邊直接選選空白模板 (Blank Project),隨便輸入專案名稱就可以開始我們的$\LaTeX$旅程了。
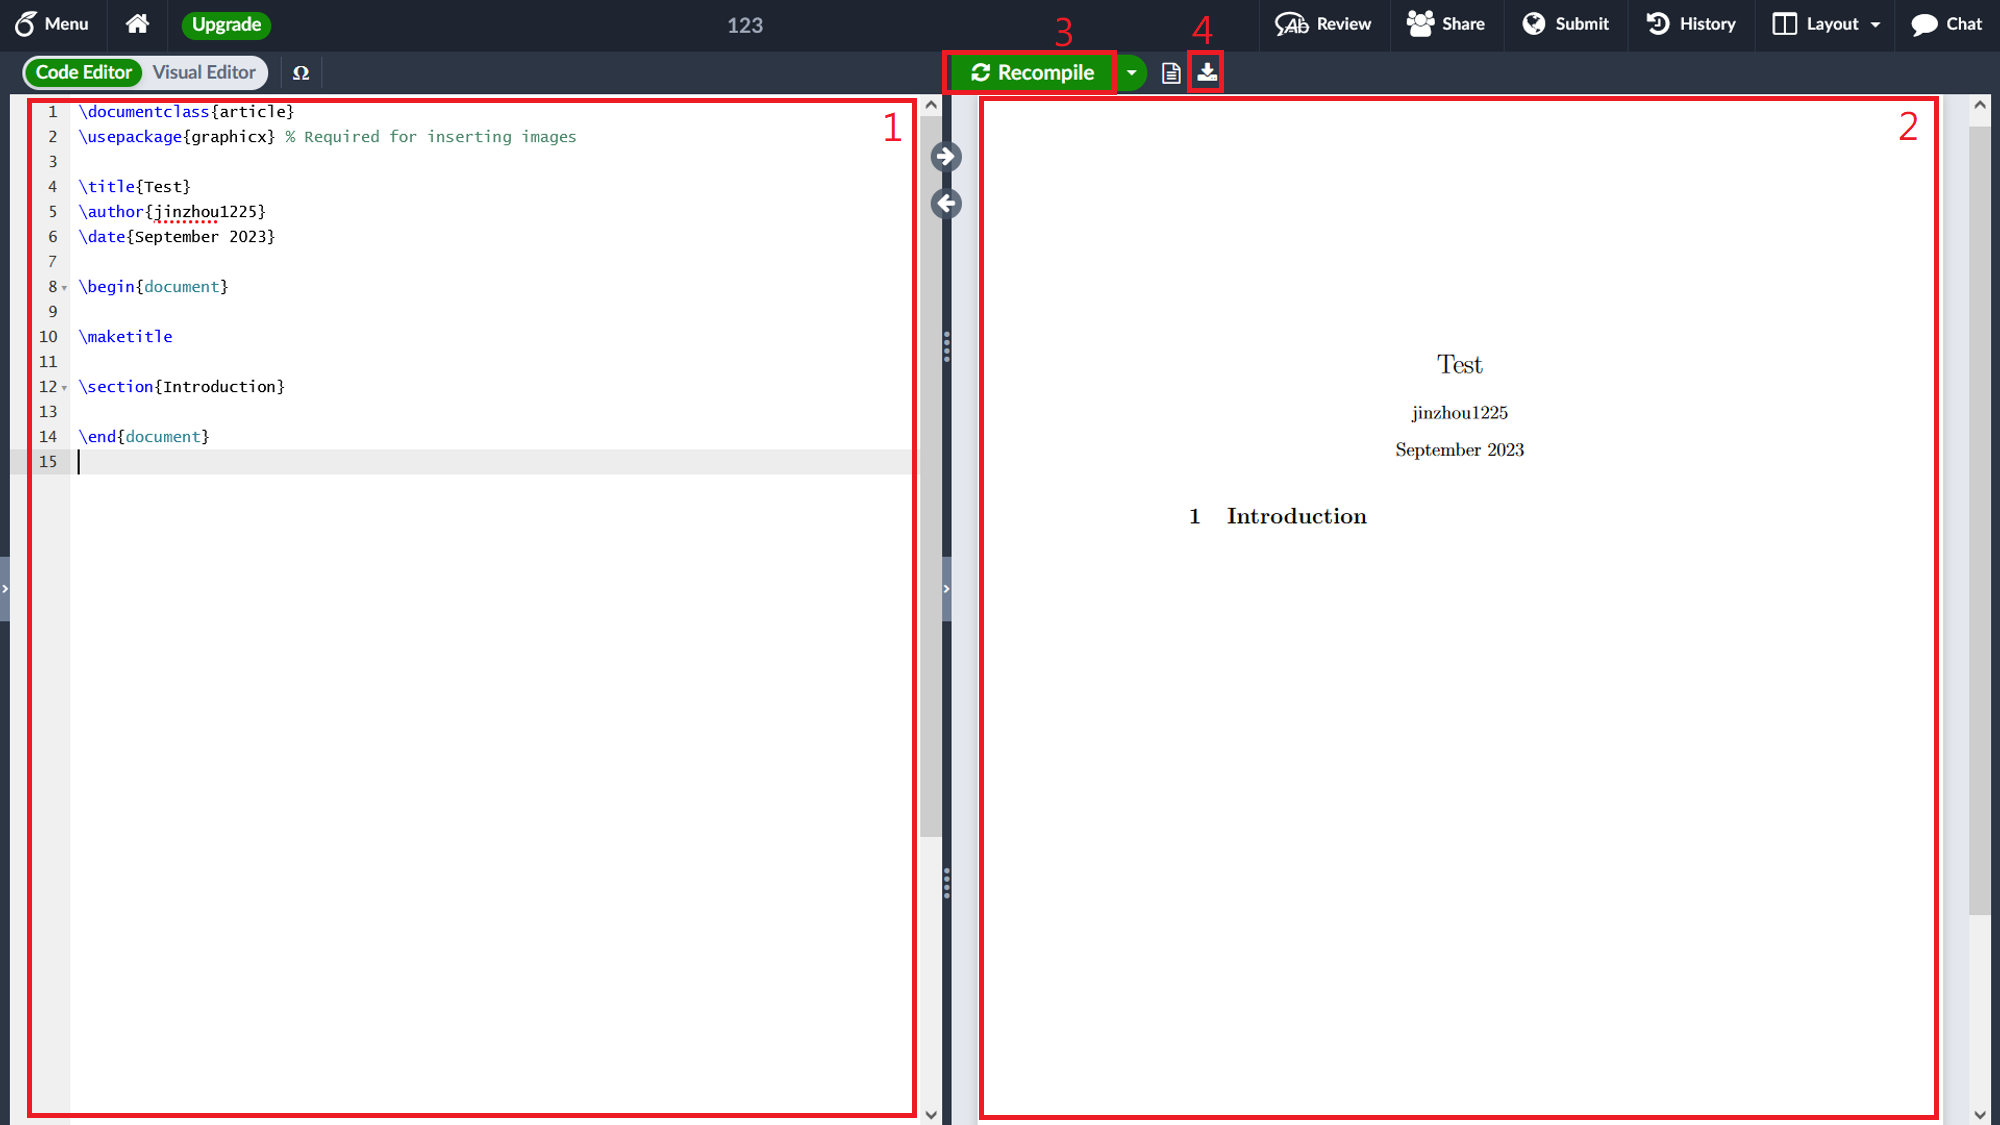
我們見到的畫面是這樣
- 程式區:所有操作都會在這邊執行
- 預覽區:預覽你操作後的結果
- 編譯:$\LaTeX$並不是一個可視化的操作模式,每次在程式區完成操作之後要按下編譯才能執行。
- 下載:完成編輯之後,點下載就可以獲取對應的.pdf檔案
在左側的程式區,能看到以下內容。在%後面是註解。
\documentclass{article}
\usepackage{graphicx} % Required for inserting images

\title{Test}
\author{XXXXX}
\date{September 2023}

\begin{document}

\maketitle

\section{Introduction}

\end{document}
語法結構
在$\LaTeX$的語法可以分為指令 (command),格式是\指令名稱或者有的指令需要參數\指令名稱{參數1}{參數2},例如
\maketitle

\documentclass{article}

\frac{1}{2}
令一種則是環境 (environment),格式是\begin{環境名稱} … \end{環境名稱}或者有的環境需要參數\begin{環境名稱}{參數1}{參數2} … \end{環境名稱},例如
\begin{tabular}{ccc}
	cell1 & cell2 & cell3 \\
	cell4 & cell5 & cell6 \\
	cell7 & cell8 & cell9 \\
\end{tabular}
現在再回去看預設的$\LaTeX$模板,以document的環境做為分界,可以看到內容可分為兩部分。
\documentclass{article}
\usepackage{graphicx} % Required for inserting images

\title{Test}
\author{XXXXX}
\date{September 2023}

% document以外是設置區
% ------------------------
% document以內是內文區

\begin{document}

\maketitle

\section{Introduction}

\end{document}
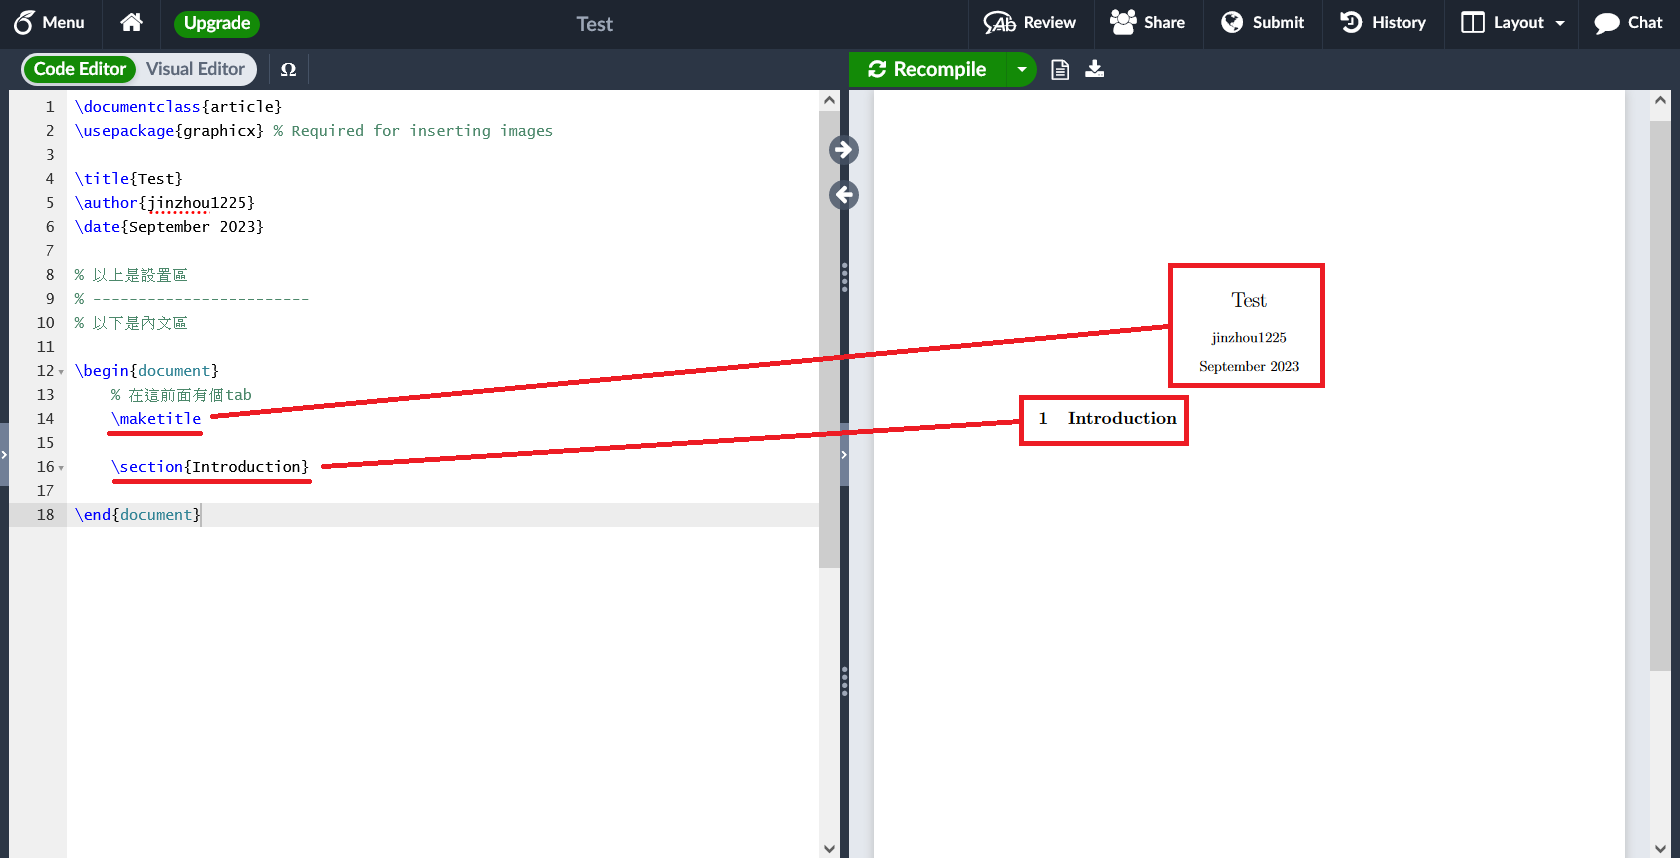
個人建議,每遇到一個環境就給一個縮排 (tab),這樣會比較好檢查與編輯。例如
\documentclass{article}
\usepackage{graphicx} % Required for inserting images

\title{Test}
\author{XXXXX}
\date{September 2023}

% document以外是設置區
% ------------------------
% document以內是內文區

\begin{document}
    % 在這前面有個tab
    \maketitle
    \section{Introduction}
\end{document}
內文設計
上半部的設置區先不處理,先將重心放到內文設計,也就是document環境內,我們要呈現的內文都會在裡面操作
\begin{document}
    % 在這前面有個tab
    \maketitle
    \section{Introduction}
\end{document}
在這範例中有兩行,分別是\maketitle和\section{Introduction},功能分別是「製作標題」與「宣告一個叫 Introduction 的段落」
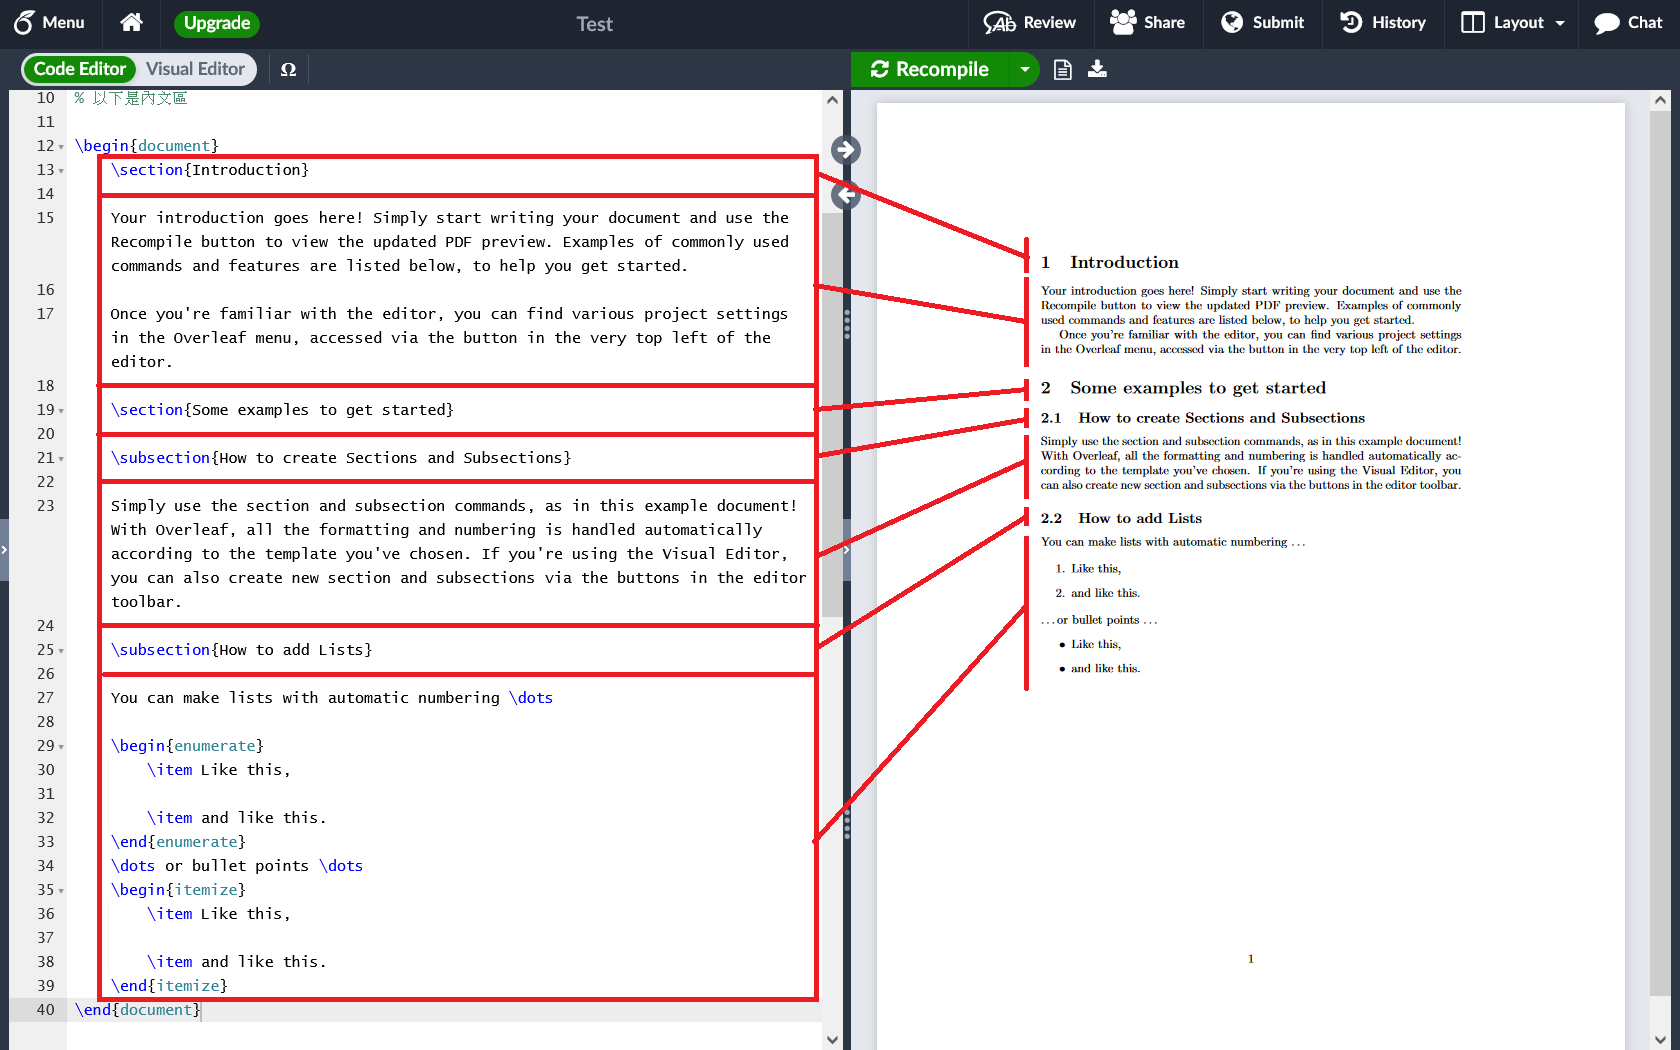
將下列這段內容複製到Overlaef裡
\documentclass{article}
\usepackage{graphicx} % Required for inserting images

\title{Test}
\author{XXXXX}
\date{September 2023}

% 以上是設置區
% ------------------------
% 以下是內文區

\begin{document}
    \section{Introduction}

    Your introduction goes here! Simply start writing your document and use the Recompile button to view the updated PDF preview. Examples of commonly used commands and features are listed below, to help you get started.

    Once you're familiar with the editor, you can find various project settings in the Overleaf menu, accessed via the button in the very top left of the editor.

    \section{Some examples to get started}

    \subsection{How to create Sections and Subsections}

    Simply use the section and subsection commands, as in this example document! With Overleaf, all the formatting and numbering is handled automatically according to the template you've chosen. If you're using the Visual Editor, you can also create new section and subsections via the buttons in the editor toolbar.

    \subsection{How to add Lists}

    You can make lists with automatic numbering \dots

    \begin{enumerate}
        \item Like this,

        \item and like this.
    \end{enumerate}
    \dots or bullet points \dots
    \begin{itemize}
        \item Like this,

        \item and like this.
    \end{itemize}
\end{document}
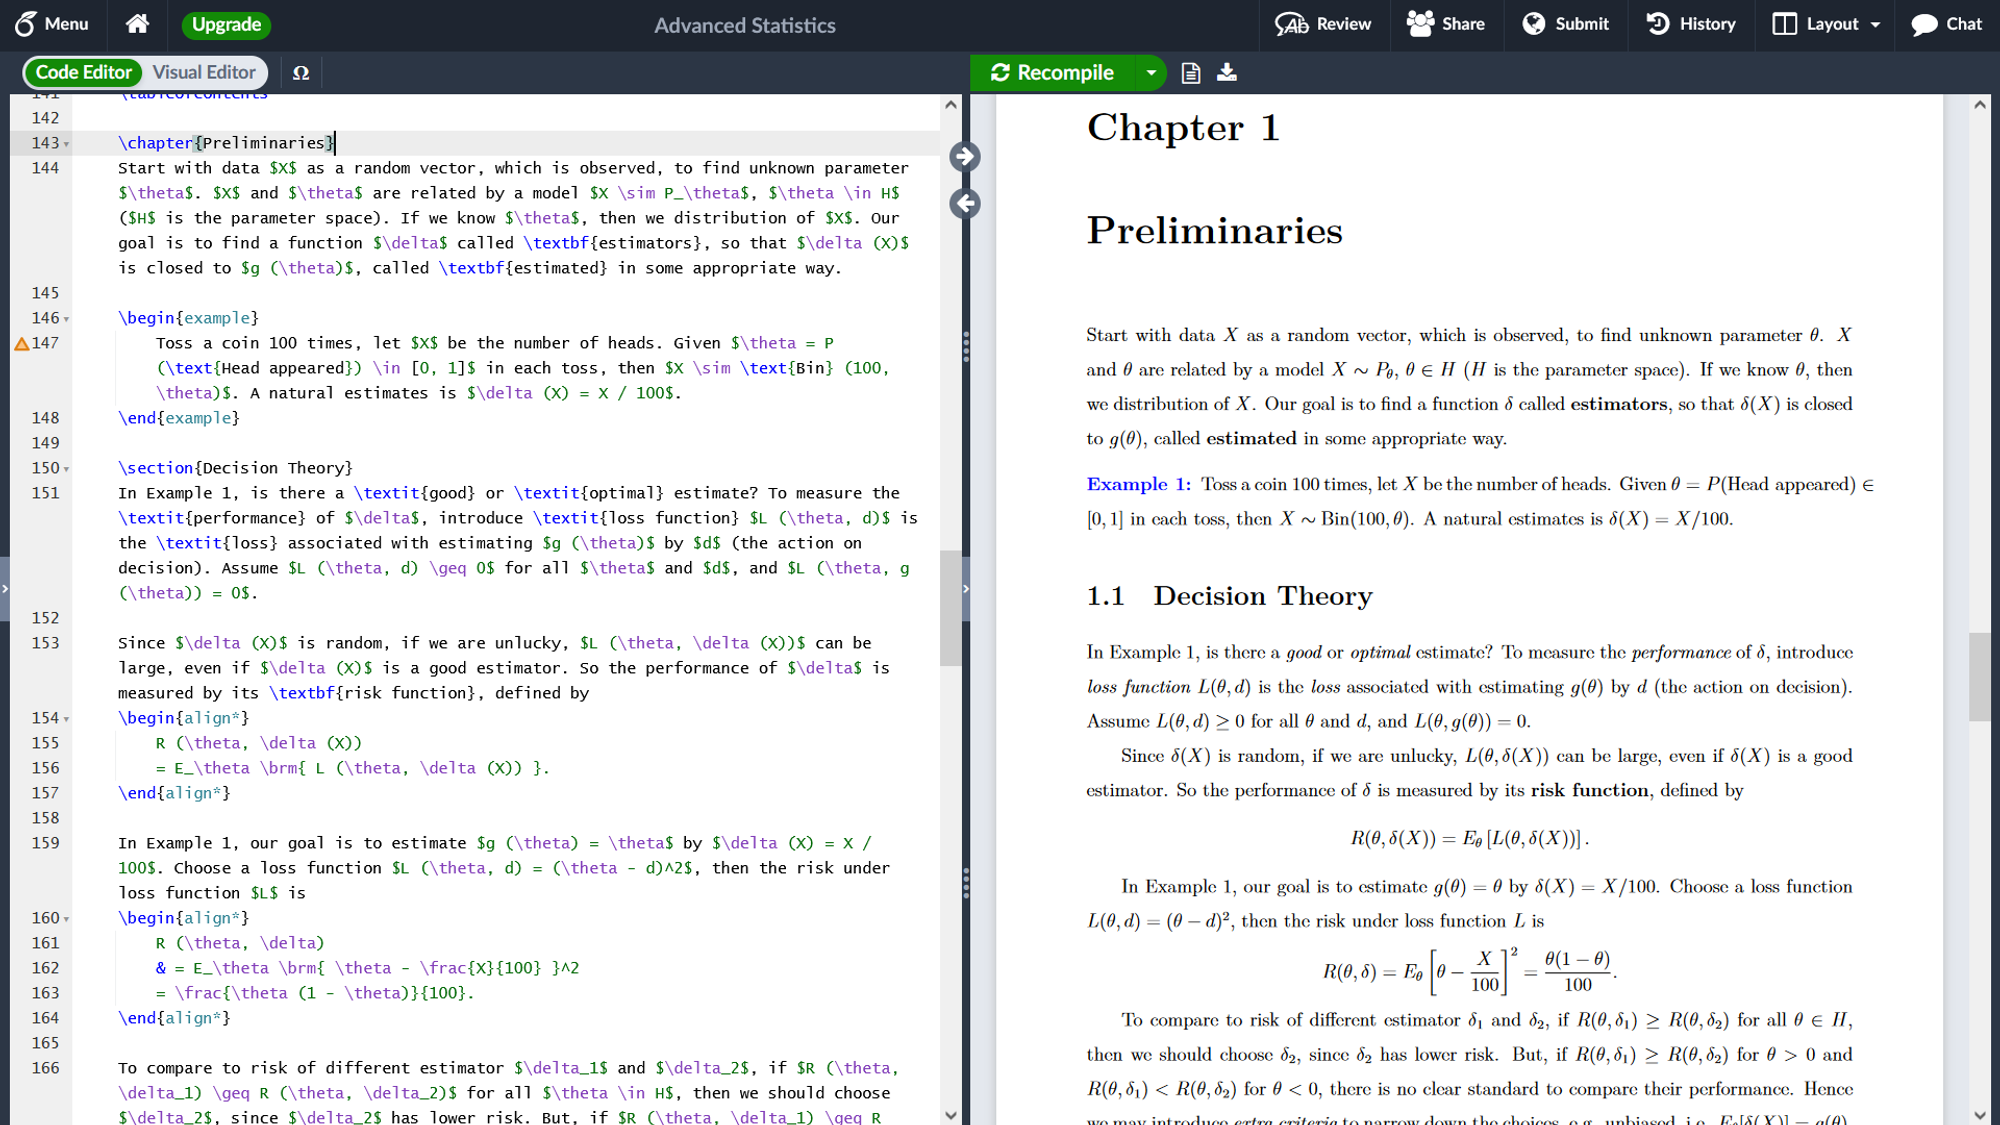
內文階層
其中使用到了\section{}和\subsection{},分別是指「節」與「子節」,在$\LaTeX$的架構中,分層依序是
- 部:
\part{} - 章:
\chapter{} - 節:
\section{} - 子節:
\subsection{} - 子子節(?):
\subsubsection{} - 段:
\paragraph{} - 子段:
\subparagraph{}
{}內的參數就填入相對應的章節名稱。一般來說,\section是大部分文章的最高階層。然而在書籍或期刊等比較長的文章會用到\chapter或\part。
\section{first section}

\paragraph{a paragraph}

\subsection{small section}

\subsection{another small section}

\section{second section}
文字風格
常用的字體操作大致上有下列幾種
- 粗體:
\textbf{Bold} - 斜體:
\textit{italic} - 底線:
\underline{underlining}
Bold text like this \textbf{Bold}
Italic text like this \textit{italic}
Underlining text like this \underline{underlining}
換行
如果將上述文字直接複製進入$\LaTeX$,會發現他並沒有換行。這是因為$\LaTeX$會被用來編輯極長的內文,我們希望內文區能比較好管理,因此這樣在「內文區只換一行,並不會導致預覽區也換行。」
要換行的話有兩種選項
- 加上
\\
Bold text like this \textbf{Bold} \\
Italic text like this \textit{italic} \\
Underlining text like this \underline{underlining}
- 再多換一行
Bold text like this \textbf{Bold}

Italic text like this \textit{italic}

Underlining text like this \underline{underlining}
特別注意,一次想換多行內容,用以下操作仍只會換一行
Bold text like this \textbf{Bold}

Italic text like this \textit{italic}
如果想編輯考卷時留空白給學生操作,例如想留3行的空間,可以用以下操作
Bold text like this \textbf{Bold} \\ \\ \\

Bold text like this \textbf{Bold} \\\\\\

Italic text like this \textit{italic}
空格與縮排
- 空格:
\ - 縮排(tab):
\quad
This is a \ sample \quad content.
注意,在某些環境或操作下有時發現無法換行,可以嘗試加入一格空格再換行,即
\ \\
清單
在清單內的每個元素前加入\item標記,會自動排序並給予編號。
- 無號清單:
\begin{itemize}
    \item First itemize

    \item Second itemize

    \begin{itemize}
        \item Itemize in a itemize

        \item Another itemize in a itemize
    \end{itemize}

    \item Third itemize
\end{itemize}
- 有號清單
\begin{enumerate}
    \item First enumerate

    \item Second enumerate

    \begin{enumerate}
        \item enumerate in a enumerate

        \item Another enumerate in a enumerate
    \end{enumerate}

    \item Third enumerate
    \begin{enumerate}
        \item
        \begin{enumerate}
            \item
            \begin{enumerate}
                \item
            \end{enumerate}
        \end{enumerate}
    \end{enumerate}
\end{enumerate}
圖片
https://www.overleaf.com/learn/latex/Inserting_Images
設置區設定
再次看回預設的模板,我們將解釋上半部的設置區如何操作
\documentclass{article}
\usepackage{graphicx} % Required for inserting images

\title{Test}
\author{XXXXX}
\date{September 2023}

% document以外是設置區
% ------------------------
% document以內是內文區

\begin{document}
    % 在這前面有個tab
    \maketitle
    \section{Introduction}
\end{document}
標題、作者與日期
這三行分別是「標題」、「作者」與「日期」
\title{Test}
\author{XXXXX}
\date{September 2023}
由於編輯日期可能會變動,因此有時也會使用
\date{\today}
並且在內文區加入\maketitle可以製作一個簡單的標題
\documentclass{article}
\usepackage{graphicx} % Required for inserting images

\title{Test}
\author{XXXXX}
\date{\today}

% document以外是設置區
% ------------------------
% document以內是內文區

\begin{document}
    \maketitle
\end{document}
套件
套件是$\LaTeX$最方便的功能之一,他能直接引入許多別人製作的套件使用,以下介紹一些常用的套件
geometry
預設的邊界其實蠻大的,可以用geometry設定紙張大小與邊界,以下是我建議的設定
\usepackage{geometry}
\geometry{a4paper, margin=2cm}
常用的紙張大小基本都有,例如A4與B3
\geometry{a4paper}
\geometry{b3paper}
紙張邊界則是可以分開設定上(top)、下(bottom)、左(left)與右(right)。
\geometr{top=0.5cm, bottom=1cm, left=1.5cm, right=2cm}
或者是設定上下左右邊界一樣大
\geometry{margin=2cm}